|
Testing your new server with a hosts file is a 4 step process:
Install hosts file entries
The first step is to install the hosts file entries on the workstation that you'll be testing from. Complete the following steps on the computer from which you plan to do testing on your new server.
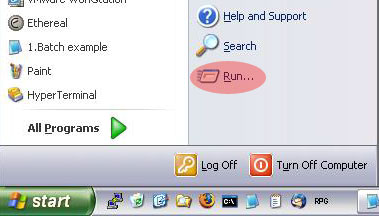
- Click on the Start menu which is usually located in the lower left of your screen.
- Click on the Run menu option.
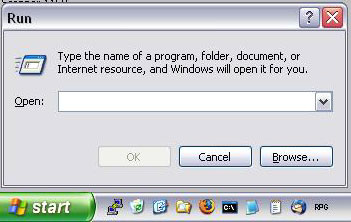
- The Run dialog box will open like this:
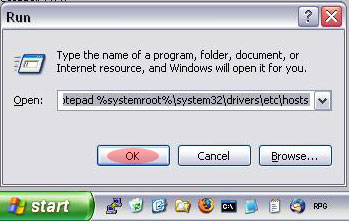
- In the "Open" field type the following text exactly as shown:
notepad %systemroot%\system32\drivers\etc\hosts
Click the "OK" button to continue.
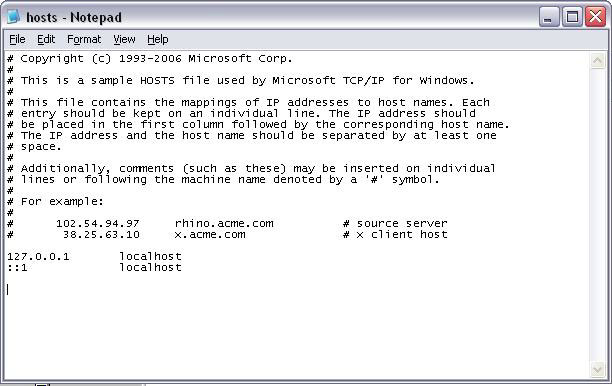
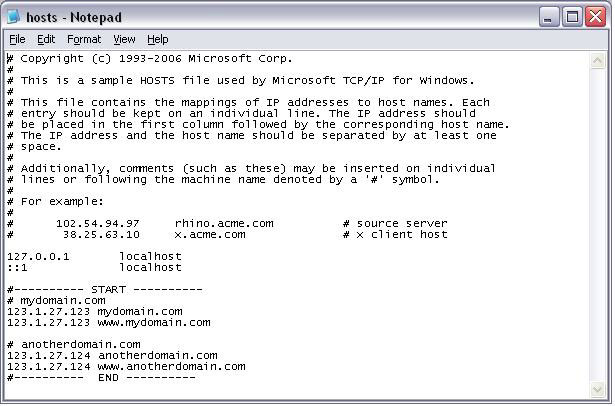
- Notepad will open and display the current contents of your hosts file.
You can ignore everything that is already in the hosts file.
- As part of the notice that your new server was ready for testing, Reliable Penguin, sent a set of "hosts file entries". For example:
#---------- START ----------
# mydomain.com
123.1.27.123 mydomain.com
123.1.27.123 www.mydomain.com

# anotherdomain.com
123.1.27.124 anotherdomain.com
123.1.27.124 www.anotherdomain.com
#----------  END ----------
Locate the email containing these entries.
- Cut and paste from email the entries that were sent for testing your server to the bottom of your hosts file in Notepad.
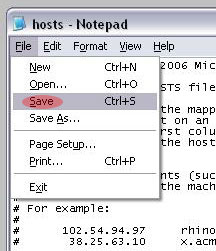
- Save the modified hosts file by opening the file menu and selecting Save.
- Close the Notepad containing the hosts file.
Verify connection to new server.
The next step is to verify that your computer is using the hosts file and connecting to the new server instead of the old server.
- Click on the Start menu which is usually located in the lower left of your screen.
- Click on the Run menu option.
- The Run dialog box will open like this:
- In the "Open" field type the following text exactly as shown:
cmd
Click the "OK" button to continue.
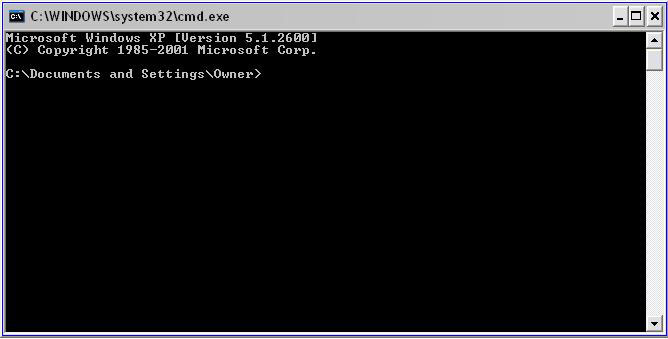
- A black command window will open:
- Look at your hosts file entries. Pick one of the domains. Take note of the IP address at the beginning of the line. For example if you have the following entry:
# reliablepenguin.com
72.32.84.173 reliablepenguin.com
72.32.84.173 www.reliablepenguin.com
The domain is "reliablepenguin.com" and the IP address is 72.32.84.173.
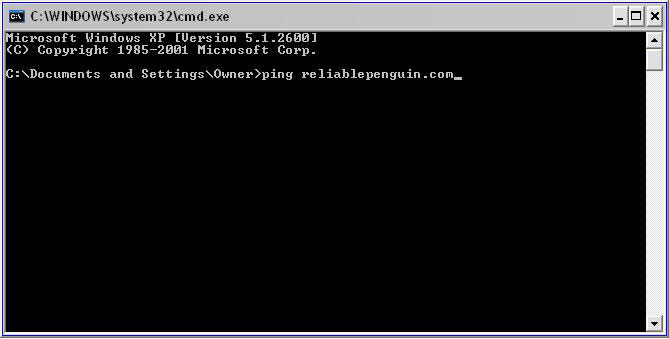
- In the command window type "ping" followed by the domain name and then press Enter on the keyboard. For example:
ping reliablepenguin.com
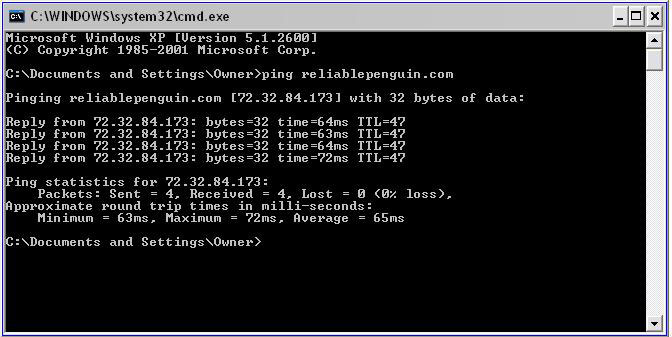
- After pressing enter you'll see something like this:
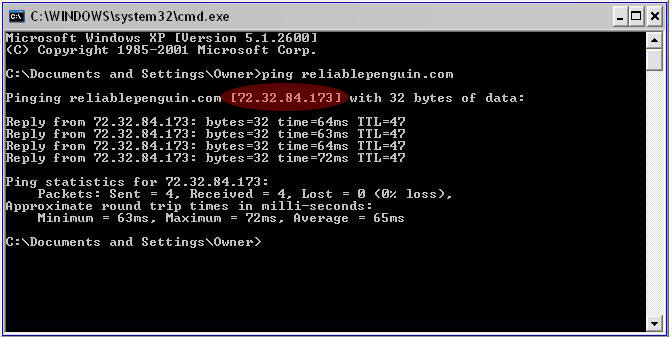
- Find the IP address that your computer resolved for the domain name as shown below:
In our example it's 72.32.84.173. Compare this to the hosts file entries. The IP address from the "ping" should be the same as the IP address shown in the hosts file for that domain.
If the addresses are different, then something is wrong. Stop here and contact Reliable Penguin technical support for assistance. If the IP addresses are the same then proceed to the next section.
Test websites on new server.
Now it's time to look at your websites on the new server. Open your web browser and go to any of the domains listed in the hosts file. You'll see what the site looks like on the new server.
Try surfing through your website. Does it look ok? Are there any broken images or formatting problems?
If your site includes a database application like an online store, forum, blog or other application, then try using it's features. Can you place an order or post a message?
You don't need to test every single page of every website on the server. Just test enough to develop confidence that the new server is setup correctly.
If you find something that's not working correctly then report the problem to Reliable Penguin and we'll get it fixed up.
Remove hosts file entries.
Finally we'll remove the hosts file entries so that you'll be able to see the old server.
- Click on the Start menu which is usually located in the lower left of your screen.
- Click on the Run menu option.
- The Run dialog box will open like this:
- In the "Open" field type the following text exactly as shown:
notepad %systemroot%\system32\drivers\etc\hosts
Click the "OK" button to continue.
- Notepad will open and display the current contents of your hosts file.
- Remove the entries that you added at the start of the testing procedure.
- Save the modified hosts file by opening the file menu and selecting Save.
- Close the Notepad containing the hosts file.
|